Showing posts with label Cosplay. Show all posts

Saturday, May 20, 2017

DIY: Making a Bracer Pattern

Hello, yeah, it's been a while.  Not much.  How 'bout you?
Yes.  I listen to pop songs from the seventies.  Deal with it.  πŸ˜Ž
Anyway, I have another fairly easy DIY to post today.  I can't find the original post for this, but there are a few of these floating around the internet.  I had this idea pop into my head to make armor, and then I saw a cool tutorial for shoulder pauldrons.  So, then I got this great idea to make more armor.  So, I decided on something easy- namely, bracers.  Or arm cuffs.  Whichever you choose to call them.  This is a time consuming (but easy) project with DOZENS of variations.  I'll post on some of them as I make them, but for now I just have a pair of basic lace up bracers.
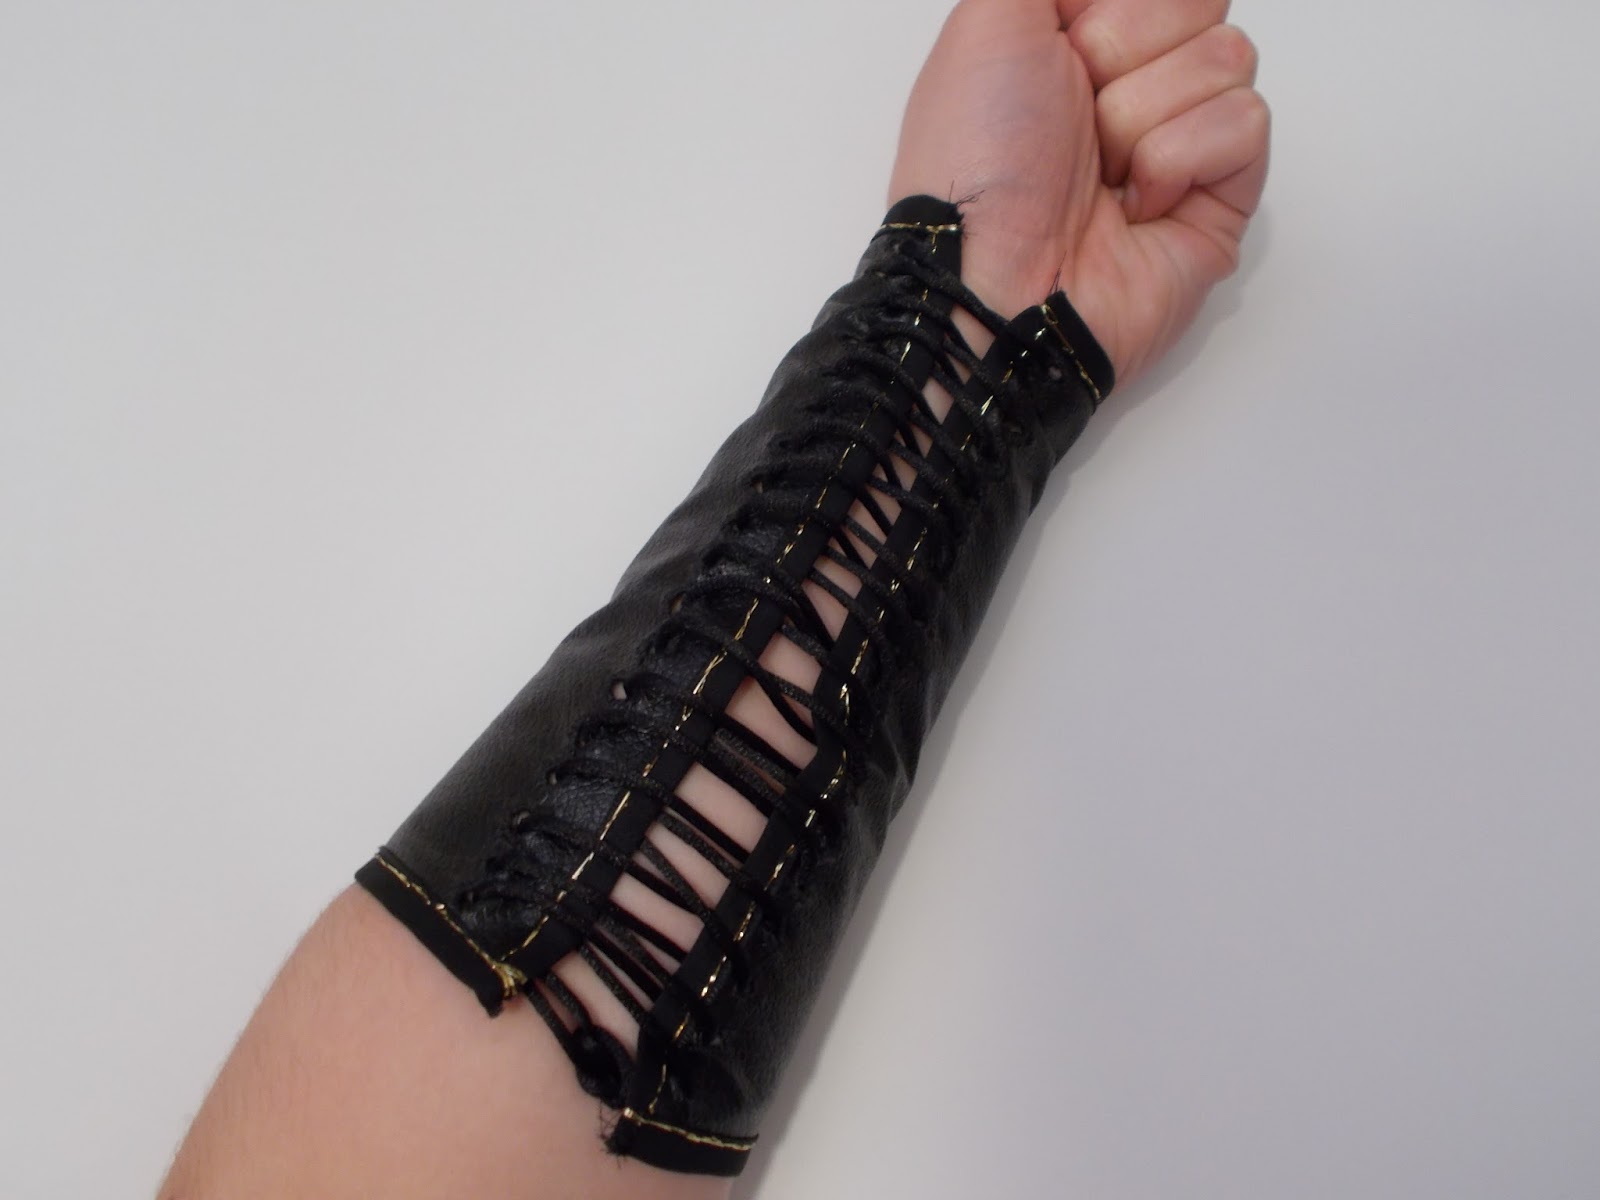


Neat, huh?
For now, I'll focus on telling you how to make the pattern.
I used wax paper, but parchment paper or tissue paper would work all right too.
Start by ripping off a large sheet.  Then, take your measurements.  This basic bracer requires three measurements.  More elaborate designs may require more.  Anyway, measure around you arm where you want your bracer to start...

And again where you want it end.

You can eyeball this, or make a mark on your arm, but then measure straight up between your two points.

If you want a gap in your final bracer (see above picture) subtract an inch or so from your measurements around.
Alright, you should have made a note of your measurements, because now we need them.  Starting on the straight edge of your paper (this is an edge you haven't EVER had to cut), measure either the top or bottom length.  I did the bottom one (the longest one around).  Then, using a ruler, draw a line straight up from the middle of this edge in the length you want the bracer to be.
Determine the middle point of your shorter measurement, and draw a line straight across the line you just drew, so you have a capital T.  Connect the endpoints on either side  so you have a trapezoid.
Cut the pattern out, and that's it!  You've made a pattern!
It should look like this...
And that's that!  The next post will be on actually making the bracer.  After that, I'll probably discus variations on this basic pattern.
Until next time!  πŸ˜’πŸ™‹πŸ‘»πŸ‘ΌπŸ‘½πŸ’€πŸ’£πŸ’’πŸ’ž

Wednesday, May 10, 2017

DIY: easy chemise from a pillowcase

So, my current favorite crafting thing to do is sew.  I know, I know.  Just give me a few weeks, and I'll be sick of it.
Anyways, I've always loved Medieval and Renaissance gowns, and decided that trying to make a pseudo-Medieval gown would be a good idea (more on that later).  After doing a lot of research, I stumbled across this excellent blog and  I also researched on Medieval undergarments.  Hey, I might as well attempt to be somewhat accurate!  So, she has a post on how to make a chemise.  (For those of you who don't know, a chemise is also known as a shift or a slip.  It's basically a nightgown women would wear under their dresses as an additional layer.)  The post is kind of hard to follow, and I couldn't find any full size sheets to use.  So, I decided to make do with an old pillowcase I found.
For this project, you'll need:
One white pillowcase (you can use two though)
White thread.
White ribbon or white lace
Scissors, pins, needles, a seam ripper, and a measuring tape

Start by turning your pillowcase inside out.  Now, take a look at it.  There's an open end.  There are two sides that are stitched together, and one side that's just the piece of fabric folded in half.  We're going to rip out the seam in the side opposite the open side.
Start by cutting off the chain of knots.  It should look something like this:
Cut that bad boy off, and start ripping out the seam.  This shouldn't take long, and once you're done, pull any loose threads out of the fabric.
DON'T pull any fraying threads from the fabric itself!  You don't want it to unravel!
Now, I didn't take enough pictures, but you're going to hem this newly made edge.  You're not stitching the fabric back together, you're hemming the two sides. So, fold it down about an inch and stitch the fold down.  I had to do this by hand, but it would easy with a machine.  This line doesn't have to be perfect, because this is on the inside of the pillowcase.
That's what it looked like when it's turned right-side out.  Now, you just have to add sleeves.  I just made it sleeveless.  I cut two eighteen inch pieces of white ribbon and stitched them to the pillowcase.  You are going to have to measure here.  Measure from shoulder to shoulder, where you want the sleeves to rest.  Also, eighteen inches was too long, so I tried the chemise on and shortened the straps accordingly.  Just fold the excess inside and stitch it down.
You should end up with this:
Very simple, but it'll get the job done.
Now, about this fit.  The pillowcase was tight across my hips, and it gaped at the back.  There isn't really a solution for that, but a safety pin to pick up the slack worked for me.
Well, I hope this was somewhat helpful.  If you have a question, leave a comment!  
Until next time!  πŸ‘¨πŸ‘ˆ❤πŸ‘€πŸ˜§πŸ˜›